
When building modern web layouts, you’ll often need to control how elements overlap on the page. This is where the z-index property in CSS becomes essential. CSS z-index determines the stacking order of elements, essentially, which elements appear in front of or behind others when they occupy the same space.
However, understanding z-index goes beyond just assigning a higher number. The real key lies in grasping the concept of stacking context, a foundational principle that defines how elements are layered in the browser. Without this understanding, managing overlapping content can lead to frustrating bugs and unexpected behavior.
In this article, CSS Z-index Explained, we’ll break down how z-index works, explain stacking contexts in clear terms, show real-life examples, and give you practical tips and best practices to use this powerful property with confidence. Whether you’re a beginner or looking to solidify your understanding, this guide will help you master layering in CSS.
Are you planning to become a software developer? If so, our software engineering courses in Kenya are designed just for you. At allthingsprogramming.com, we offer hands-on, practical training to help you gain in-demand skills and land a high-paying job in just 10–12 months.
What Is Z-index in CSS?
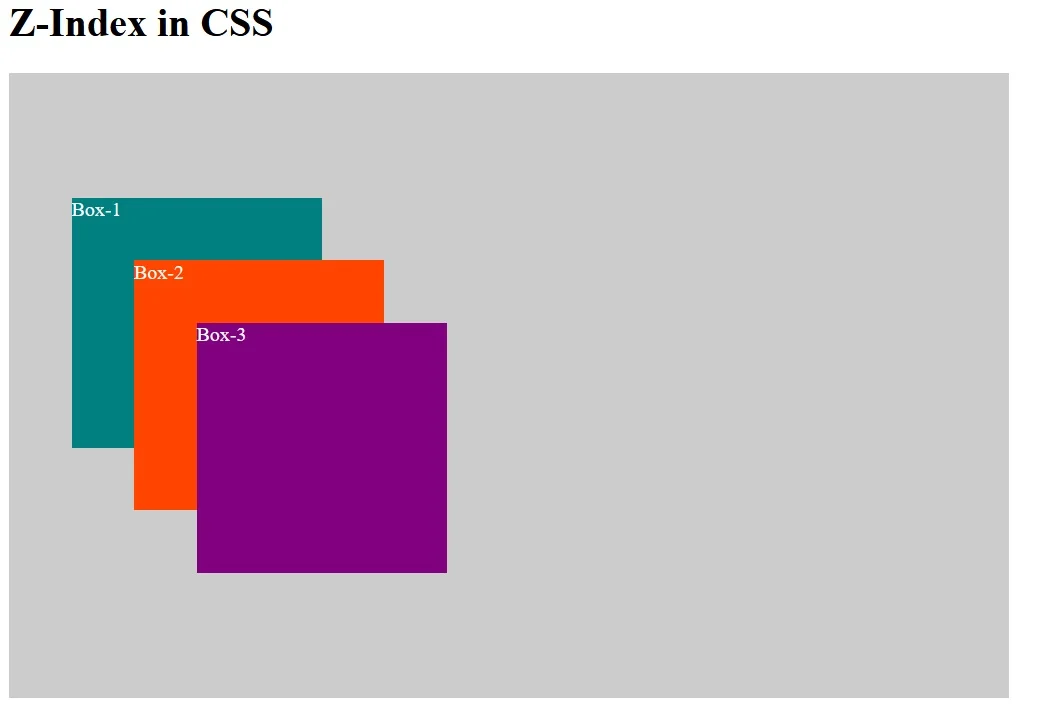
The z-index property in CSS controls the stacking order of elements along the z-axis (an imaginary vertical axis extending out of the screen). When elements overlap, z-index determines which one appears in front of the others.
By default, elements stack based on their order in the HTML document, the later an element appears, the higher it sits. But when you need precise control over which elements layer above or below others (like modals, dropdowns, or tooltips), z-index comes into play.
Syntax and Basic Usage
To use z-index, the element must first be given a positioning context by setting its position to relative, absolute, fixed, or sticky.
element {

  position: relative;

  z-index: 10;

}
In this example:
- position: relative; makes the element “positioned” and eligible for z-index stacking.
- z-index: 10; places the element above other positioned elements with a lower z-index (or no z-index at all).
The higher the z-index value, the closer the element appears to the viewer. Negative values can also be used to push elements behind others, but they come with certain caveats depending on the stacking context.
Understanding this simple rule sets the stage for mastering more complex stacking behavior in CSS layouts.
How CSS Z-index Works
To fully understand how z-index works in CSS, it’s essential to grasp how elements are layered in the browser, this is known as the stacking order.
Understanding the Stacking Order
The stacking order is the sequence in which elements are painted on the screen. Elements with a higher stacking order appear in front of those with a lower one. By default, HTML elements stack in the order they appear in the source code, newer elements are painted over older ones.
When you assign a z-index value, you’re modifying this order explicitly.
Higher Values Appear on Top
The z-index value is a number (positive, negative, or zero) that controls the element’s position along the z-axis:
- Elements with a higher z-index will appear on top of those with a lower one.
- If two elements have the same z-index, the one that comes later in the HTML will be rendered above.
Example:
/* Box A */

.box-a {

  position: absolute;

  z-index: 5;

}

/* Box B */

.box-b {

  position: absolute;

  z-index: 10;

}
In this case, .box-b will appear above .box-a because it has a higher z-index.
Only Works on Positioned Elements
The z-index property only applies to elements that are positioned, meaning they have one of the following position values:
- relative
- absolute
- fixed
- sticky
If an element has a z-index but is not positioned, the z-index will have no effect.
/* This will not work */

.box {

  z-index: 10; /* Ignored */

}

/* This will work */

.box {

  position: relative;

  z-index: 10;

}
Understanding these basics ensures you use z-index effectively and avoid confusion when elements don’t layer the way you expect.
The Concept of Stacking Context
To fully harness the power of z-index, you need to understand a critical concept behind it: the stacking context. Without this knowledge, you may run into confusing layering issues even when using the “right” z-index values.
What Is a Stacking Context?
A stacking context is an environment in which a set of elements is stacked in a specific order along the z-axis. Think of it like a mini-layered universe, everything inside it can be layered relative to each other, but not always across different stacking contexts, even if z-index values seem higher.
Each stacking context is isolated from the ones outside it. So, a child with a z-index: 9999 inside a lower stacking context won’t necessarily appear above a parent with z-index: 1 in a higher context.
How Stacking Contexts Are Created
There are several ways stacking contexts can be formed. Understanding these helps you troubleshoot overlapping issues more effectively.
1. The Root Element
Every webpage starts with a default stacking context created by the <html> element, the root of the document.
2. Positioned Elements with Z-index
If an element is:
- Positioned (relative, absolute, fixed, or sticky)
- And has a z-index other than auto
…it creates a new stacking context.
.container {

  position: relative;

  z-index: 1; /* Creates a new stacking context */

}
3. CSS Properties That Trigger New Stacking Contexts
Besides z-index, several CSS properties also create new stacking contexts, even without specifying position or z-index.
These include:
- opacity less than 1
- transform (e.g., transform: scale(1))
- filter (e.g., filter: blur(5px))
- perspective
- will-change
- mix-blend-mode other than normal
- contain: layout, paint, or strict
Example:
.box {

  transform: rotate(10deg); /* This alone creates a new stacking context */

}
Why It Matters
Even if two elements have different z-index values, they can’t overlap as expected if they belong to different stacking contexts. In those cases, the stacking context hierarchy, not just z-index, determines which element appears on top.
Understanding stacking contexts gives you the insight you need to solve tricky z-index bugs and build clean, layered interfaces with confidence.
Common Use Cases for Z-index
The z-index property is frequently used in modern web design to control how elements visually stack on top of one another. Here are some common, real-world scenarios where z-index plays a key role:
1. Overlapping Modals or Pop-ups
Modals and pop-ups need to appear above the main page content, no matter where they are placed in the HTML. A high z-index ensures the modal overlays everything else, including backdrops and headers.
.modal {

  position: fixed;

  z-index: 1000;

}
2. Dropdown Menus and Tooltips
Navigation dropdowns and tooltips often appear on hover or click. Without a proper z-index, they might get hidden behind other elements like images or containers.
.dropdown-menu {

  position: absolute;

  z-index: 500;

}
3. Layering Background Elements
Sometimes you need to layer background effects, shapes, or decorative elements behind or above content. Using z-index helps control which layers appear where.
.background-shape {

  position: absolute;

  z-index: -1; /* Pushed behind content */

}
4. Managing Header Overlap on Scroll
Sticky or fixed headers should remain on top of scrolling content. Applying a higher z-index ensures they don’t get buried as new content enters the viewport.
.sticky-header {

  position: sticky;

  top: 0;

  z-index: 100;

}
Using z-index in these scenarios helps maintain visual clarity and improves user interaction, ensuring important UI elements stay visible when needed.
Real-world examples of CSS Z-index
Understanding how z-index works in theory is helpful, but seeing it in action makes it easier to apply in real projects. Here are three common scenarios where z-index solves real UI problems.
Example 1: Layering a Modal Over Page Content
A modal should appear above all other elements when triggered. Without a z-index, it may be hidden behind content.
<div class="page-content">Main Content</div>

<div class="modal">Modal Window</div>
.page-content {
position: relative;
z-index: 1;
}
.modal {
position: fixed;
top: 20%;
left: 50%;
transform: translateX(-50%);
background: white;
padding: 20px;
z-index: 1000; /* Ensures it appears on top */
box-shadow: 0 0 10px rgba(0, 0, 0, 0.3);
}Example 2: Fixing a Dropdown Menu Behind an Image
If a dropdown is appearing under a banner or image, you can fix it using z-index.
<div class="nav">

  <button>Menu</button>

  <ul class="dropdown">...</ul>

</div>

<img class="banner" src="banner.jpg" />
.nav {
position: relative;
z-index: 10;
}
.dropdown {
position: absolute;
top: 100%;
left: 0;
background: white;
z-index: 15; /* Ensures it's above the image */
}
.banner {
position: relative;
z-index: 5; /* Lower than dropdown */
}Example 3: Using Z-index in Responsive Designs
On smaller screens, you may need to layer UI elements differently, for instance, showing a mobile menu above all content.
/* Default (desktop view) */

.mobile-menu {

  display: none;

}

/* Mobile view */

@media (max-width: 768px) {

  .mobile-menu {

    display: block;

    position: fixed;

    top: 0;

    left: 0;

    z-index: 999;

    width: 100%;

    height: 100%;

    background: white;

  }

  .page-content {

    z-index: 1;

  }

}
These real-world examples show how z-index solves practical layout issues across different device sizes and UI components. When used correctly, it ensures smoother, more intuitive visual hierarchies.
Tips and Best Practices
Using z-index effectively goes beyond just assigning higher numbers. Here are some best practices to help you write cleaner, more maintainable CSS and avoid common z-index headaches:
1. Keep Z-index Values Organized
Rather than using random numbers, structure your z-index values in a logical range. For example:
- Base content: z-index: 1–99
- Navigation: z-index: 100–199
- Modals and overlays: z-index: 1000+
This approach helps avoid collisions and makes your stacking logic easier to understand.
2. Avoid Magic Numbers Without Context
Throwing in arbitrary high values like z-index: 9999 may “work,” but it often signals an underlying issue. Use comments or CSS variables to explain or organize z-index values with intention.
:root {

  --z-nav: 100;

  --z-modal: 1000;

}

.nav {

  z-index: var(--z-nav);

}
3. Don’t Rely Solely on Z-index to Fix Layout Problems
If elements are overlapping unintentionally, review your layout structure first. Using z-index as a band-aid can lead to a fragile UI. Often, Flexbox or Grid layouts can solve the issue more cleanly.
4. Use as Few Stacking Contexts as Possible
Too many stacking contexts make it harder to control layering. Only create them when necessary (e.g., for modals or isolated UI elements). Unintentional stacking contexts from properties like transform or opacity < 1 can complicate things, so inspect your CSS carefully.
Following these best practices will help you use z-index in a more predictable, scalable way, especially in larger projects or when collaborating with a team.
Common Pitfalls and How to Avoid Them
The z-index property may seem simple at first, but it’s often a source of confusion. Here are some common mistakes developers make when using z-index, and how you can avoid them:
1. Setting Z-index Without a Positioned Element
Mistake:
Applying z-index to an element that does not have a position value (relative, absolute, fixed, or sticky).
Why does it fail?
Unpositioned elements (with position: static, which is the default) ignore z-index completely.
Fix:
Always set a positioning value when using z-index.
/* Incorrect */

.box {

  z-index: 10; /* Will not work */

}

/* Correct */

.box {

  position: relative;

  z-index: 10;

}
2. Creating Unintentional Stacking Contexts
Mistake:
Using CSS properties like transform, opacity, or filter without realizing they create new stacking contexts.
Problem:
This isolates the element and its children from other parts of the stacking order, possibly preventing them from overlapping as expected.
Fix:
Be cautious when applying these properties and understand when you’re creating a stacking context. Use DevTools to debug stacking behavior.
.card {

  transform: translateZ(0); /* Creates a new stacking context */

}
3. Assuming Z-index Works Globally
Mistake:
Thinking a high z-index on one element will always place it above another even if they’re in different stacking contexts.
Why it fails:
z-index only affects elements within the same stacking context. A child in a lower context cannot visually rise above an element in a higher one, no matter how large its z-index.
Fix:
Make sure both elements are in the same or compatible stacking contexts if you need them to overlap in a specific way.
4. Using Negative Z-index Values Incorrectly
Mistake:
Using z-index: -1 without realizing it might push the element behind everything, including the page background or non-interactive areas.
Problem:
This can make elements invisible or unclickable.
Fix:
Use negative values carefully, and only when you’re sure the element should be behind others but still visible and functional.
.background {

  position: absolute;

  z-index: -1; /* OK if you're layering behind text, not behind <body> */

}
Avoiding these common pitfalls helps ensure that your layout behaves consistently and predictably, saving you time and debugging headaches.
Debugging Z-index Issues
Even experienced developers run into frustrating z-index problems, especially when stacking contexts come into play. Fortunately, modern browsers provide tools to help you diagnose and fix these issues efficiently. For a thorough academic explanation of stacking contexts and how the z-index property influences layout, see the UCF CIS‑4004 CSS Page Layout – Part 4 slide deck (PDF).
1. How to Inspect Stacking Order in Browser DevTools
Most modern browsers (like Chrome, Firefox, and Edge) allow you to inspect and analyze the stacking order of elements:
- Right-click the problematic element and select “Inspect”.
- In the Elements panel, look for the computed styles tab to check
- The z-index value
- The position property
- Any properties that might be creating a stacking context (e.g., transform, opacity)
Chrome DevTools even shows if an element creates a new stacking context hover over the element in the DOM tree, and look for clues in the tooltip or computed styles.
2. Visualizing Stacking Contexts
Stacking contexts aren’t visible by default, but you can make them easier to see:
- Use browser extensions or plugins like:
- CSS Stacking Context Inspector (Chrome)
- VisBug (for visual debugging overlays)
Add temporary outlines or background colors in your CSS to visualize layers:
* {

  outline: 1px solid red; /* Use with caution */

}
This helps identify which element is unexpectedly “on top” or “below.”
3. Strategies to Troubleshoot Layering Problems
When things don’t stack as expected, try the following:
- Confirm the element is positioned (relative, absolute, fixed, or sticky)
- Check for parent stacking contexts the issue might not be the element itself but a parent that creates a stacking boundary
- Temporarily remove z-index values to reset and rebuild your layering logic cleanly
- Avoid z-index wars by planning your stacking system using ranges or CSS variables
If needed, isolate the issue in a simplified test case (e.g., CodePen or JSFiddle) to test behavior in a controlled environment.
Debugging z-index is easier once you understand stacking contexts and use the right tools to visualize what’s happening under the hood. A methodical approach will save hours of frustration when troubleshooting tricky overlaps.
To conclude, the z-index property is a powerful tool for controlling how elements stack and overlap in your web layouts. While its syntax is simple, mastering it requires a solid understanding of stacking order and the often-overlooked concept of stacking contexts. If you’re serious about leveling up your front-end development skills, consider enrolling in our software development bootcamp for hands-on training and real-world project experience.
Understanding and managing stacking contexts is the key to solving the most common z-index issues. By applying the best practices and avoiding the pitfalls covered in this guide, you’ll gain greater control over your layouts.


