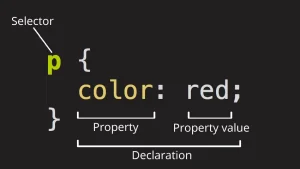
In HTML, syntax refers to the rules and conventions used to write HTML code. It dictates how tags, attributes, and elements are structured, allowing web browsers to interpret and display content correctly.
Following proper HTML syntax is vital for creating well-structured and functional web pages. Correct syntax helps ensure that web pages render consistently across different browsers, improves readability, and minimizes the likelihood of errors that can affect page performance or usability.
This guide will cover the key aspects of HTML syntax to support beginners and intermediate developers in writing clean, efficient code. By mastering these essential principles, developers can build robust, user-friendly web pages that are easy to maintain.
Basic Structure of an HTML Document
Every HTML document follows a fundamental structure that ensures proper interpretation by web browsers. At the top, the <!DOCTYPE html> declaration is required to tell the browser that the document is written in HTML5, setting the stage for consistent rendering.
The <html> element serves as the document’s root, encompassing all the content on the page. Within <html>, two main sections are essential:
- The <head> section: This part contains metadata, which includes the page’s <title>, links to stylesheets, and other information that doesn’t directly display on the page but supports functionality and SEO.
- The <body> section: This section houses all the visible content, such as text, images, videos, and other elements that the user interacts with.
Example of basic HTML structure:
<!DOCTYPE html>

<html>

<head>

    <title>Sample Page</title>

    <link rel="stylesheet" href="styles.css">

</head>

<body>

    <h1>Welcome to My Page</h1>

    <p>This is a simple example of an HTML document structure.</p>

</body>

</html>
Proper HTML syntax is crucial for ensuring that browsers can render the content accurately.
Errors in syntax, like missing closing tags or incorrect nesting, can lead to display issues and functionality problems.
HTML Tags and Elements
HTML tags are the building blocks of a web page, enclosed within angle brackets (e.g., <p>). When a tag is paired with content, it forms an HTML element.
Elements usually consist of an opening tag, the content, and a closing tag. For example, a paragraph element is structured as <p>This is a paragraph.</p>.
Some tags, such as <br> or <img>, are self-closing and do not require an end tag.
HTML elements are categorized as block-level or inline:
Block-level elements occupy the entire width of their parent container, starting on a new line. Common block-level elements include <div>, <h1>, <p>, and <section>. For instance:
<div>

    <h1>Main Heading</h1>

    <p>This is a paragraph inside a block-level element.</p>

</div>
Inline elements: These only take up as much space as needed and do not start on a new line. Examples include <span>, <a>, and <strong>. Inline elements are useful for styling parts of a text without breaking the flow:
<p>This is a <span style="color: red;">highlighted</span> word.</p>

<p>Visit <a href="https://example.com">this link</a> for more information.</p>
Proper HTML syntax ensures that block-level and inline elements are used appropriately to create clear, organized layouts. Adhering to this syntax helps prevent rendering issues and improves readability, making it easier to maintain and update the code.
Attributes in HTML Syntax
In HTML, attributes are additional information provided within an element’s opening tag to define its behavior or properties. Attributes typically consist of a name and a value pair, separated by an equals sign (=), and they modify how an element functions or displays.
For example, the src and alt attributes in a <img> tag specify the image source and alternative text:
<img src="image.jpg" alt="A descriptive text about the image">Attributes should always be enclosed in double quotes (“), though single quotes (‘) are also acceptable. This practice enhances code readability and prevents issues using special characters within values.
Common attributes include:
- href for links (<a href=”https://example.com”>Visit Example</a>),
- id and class for CSS and JavaScript targeting (<div class=”container”></div>),
- style for inline CSS (<p style=”color: blue;”>This text is blue.</p>).
Best practices for using attributes effectively
- Always use quotes around attribute values to avoid parsing errors.
- Ensure that attribute names are lowercase for consistency.
- Use descriptive alt text for images to improve accessibility and SEO.
Adhering to correct HTML syntax when writing attributes helps maintain a clean codebase, promotes browser compatibility, and improves the overall user experience.
Nesting and Hierarchical Structure
Proper nesting in HTML syntax refers to organizing elements in a structured and logical hierarchy, where each element is correctly enclosed within its parent element. This practice is essential for ensuring web browsers can accurately interpret and display content. Failing to follow proper nesting rules can lead to rendering errors, broken layouts, or unexpected behavior on the page.
Correct nesting involves maintaining a clear parent-child relationship between elements. For instance:
<ul>

    <li><p>Properly nested paragraph inside a list item.</p></li>

</ul>
In this example, the <p> element is correctly placed within the <li> tag, demonstrating proper hierarchy.
Incorrect nesting, however, violates the natural structure as demonstrated below
<p><div>Incorrect nesting: div inside a paragraph</div></p>
This example is problematic because block-level elements like <div> should not be placed within inline elements like <p>. Such mistakes can cause unexpected rendering issues and make the code difficult to maintain or debug.
Potential issues from improper nesting include:
- Elements are displayed out of order or are not appearing at all.
- Inconsistent behavior across different browsers.
- Accessibility issues that may impact screen readers.
Best practice: Always ensure child elements are appropriately enclosed by parent elements and follow logical structures. This makes code easier to read, debug, and maintain, preserving the integrity of the layout and user experience.
Void Elements and Self-Closing Tags
Void elements are unique in HTML syntax because they do not require closing tags. These elements are self-contained and represent simple elements without additional content or children. Common examples of void elements include:
- <br> for line breaks,
- <hr> for horizontal rules,
- <img> for embedding images.
In HTML5, void elements are written without a closing slash, such as:
<img src="image.jpg" alt="Description">

<br>
This syntax is valid and recommended, as browsers correctly interpret void elements without the self-closing slash (/).
However, in HTML4/XHTML, void elements were often written with a self-closing slash for stricter formatting:
<img src="image.jpg" alt="Description" />

<br />
While modern browsers still recognize this format for compatibility, HTML5 does not require or recommend it.
Key differences:
- HTML5 allows <img> and other void elements to be written without a trailing slash, simplifying code and improving readability.
- XHTML and stricter HTML4 require the slash for self-closing tags to comply with XML standards.
Comments in HTML
Comments in HTML syntax are used to add notes or explanations within the code that do not affect the rendered web page.
They are invaluable for improving code readability, making it easier for developers to understand the purpose or function of specific code sections. Comments are also helpful for temporarily disabling code during debugging.
The format for an HTML comment is:
<!-- This is an HTML comment -->
Anything written within <!– and –> is ignored by the browser and does not display on the web page.
Comments are particularly useful in complex codebases to document logic, provide guidance, or explain the structure of the code.
Best practice: Use comments sparingly and concisely to avoid cluttering the code. Well-placed comments make collaboration easier and help maintain the code over time by providing context for future developers or your future self.
Common HTML Syntax Mistakes to Avoid
When writing HTML, common syntax mistakes can hinder both readability and functionality. A frequent error is forgetting to close tags, especially for non-self-closing tags like <div>.
For example, leaving <div> unclosed can disrupt the page’s layout. Another mistake is misusing or incorrectly applying attributes, such as forgetting the quotes around attribute values (<img src=example.jpg> should be <img src=”example.jpg”>).
Additionally, improper nesting, like placing a block element (e.g., <div>) inside an inline element (e.g., <span>), can cause display issues.
To keep HTML clean and readable, adopting best practices is crucial. Consistent indentation is essential, as it enhances readability and helps organize nested elements. For instance:
<div>

    <p>Indented paragraph inside a div.</p>

</div>
Avoid inline styles when possible; instead, use CSS for styling. Inline styles (e.g., <p style=”color:red;”>Text</p>) can clutter the HTML and make updates harder. Instead, apply styles in a CSS file or a <style> block.
Using semantic HTML tags, like <header>, <footer>, and <section>, is also a best practice. These tags clarify the structure and meaning of your HTML to browsers and assistive technologies, enhancing both accessibility and SEO.
For example, instead of using multiple <div>s for sections, use <section> to define a specific part of your page:
<section>

    <h2>About Us</h2>

    <p>Information about our team.</p>

</section>
These practices improve code clarity and ensure better compatibility and maintainability.